Showing posts with label watercolor. Show all posts

Friday, May 10, 2013

RAZZLE DAZZLE THEM!

Razzle Dazzle Camouflage
Finished dazzle dazzle project for 5th grade. Sailboat and ship were pre-cut out of card stock and drawn with sharpies


Dazzle camouflage, also known as razzle dazzle or dazzle painting, was a family of ship camouflage used extensively in World War I and to a lesser extent in World War II. Credited to artist Norman Wilkinson, it consisted of complex patterns of geometric shapes in contrasting colours, interrupting and intersecting each other.
Unlike some other forms of camouflage, dazzle works not by offering concealment but by making it difficult to estimate a target's range, speed and heading. Norman Wilkinson explained in 1919 that dazzle was intended more to mislead the enemy as to the correct position to take up than actually to miss his shot when firing.
Dazzle was adopted by the British Admiralty and the U.S. Navy with little evaluation. Each ship's dazzle pattern was unique to avoid making classes of ships instantly recognisable to the enemy. The result was that a profusion of dazzle schemes was tried, and the evidence for their success was at best mixed. So many factors were involved that it was impossible to determine which were important, and whether any of the colour schemes were effective.
Dazzle attracted the notice of artists, with Picasso notably claiming cubists had invented it. The vorticist artist Edward Wadsworth, who supervised the camouflaging of over 2,000 ships during the First World War, painted a series of canvases of dazzle ships after the war, based on his wartime work.


Link to Slidetalk

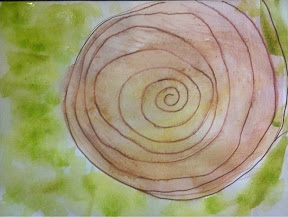
steps for watercolor backgrounds.
and project continued.....


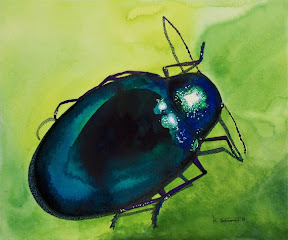
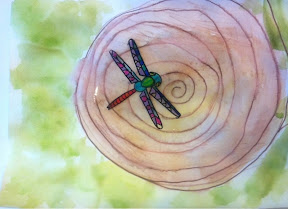
Student examples they did...... Love them!!


Wednesday, January 25, 2012

American Folk Art


American Folk Art- American folk artists were generally self-taught artists who wanted to tell a story, through pictures, about specific events depicting life in rural areas.                The most famous is Grandma Moses(1860–1961), US painter; full name Anna Mary Robertson Moses. She took up painting as a hobby when widowed in 1927 and produced more than a thousand paintings in a primitive stylemostly of rural life.  see American Folk Art Museum
The Checkered House- Grandma Moses


The kids are going to do a Watercolor and Salt Painting I had seen on a great blog, Art Projects For Kids


Materials needed:
White paper
 Oil pastels, I used dark purple, they just need one to draw with.
pencils
Folk Art Chicken by Devon Roe
Water colors and palettes to put it in. you can use watercolor pans and have them pick and choose what colors they like,  or you can use liquid watercolor which is highly pigmented and limit the colors used. 
salt
brushes


Show them the slideshow below and then,


Demonstrate and have them do the following...


1.The students will first draw a round circle on the upper left for the head.  Then a line is drawn to the right, and curve below to make a large half circle for the body. Two legs are added, curves for the tail, and details on the head.  All these lines are traced with a oil pastel when complete. 
2. have them paint the chickens body first with watercolor.  while the paint is still wet, sprinkle a bit of salt on it.  The salt absorbs the water, making a cool texture, and may be rubbed off when the entire painting is complete.  After the body is filled, the background may be painted in with one or more colors. 

Another fun chicken folk art
3. When it is completely dry, after a day or so, you can wipe off the salt, and take pictures for Artsonia.  The chicken looks great framed in your kitchen!


Link to slideshow


Monday, October 3, 2011

Paul Klee


A Swiss-born painter and graphic artist whose personal, often gently humorous works are replete with allusions to dreams, music, and poetry, Paul Klee, b. Dec. 18, 1879, d. June 29, 1940.


For this project you will need watercolor paper.
Liquid watercolor. Deep blue and green. I use magic watercolor in the bottle without diluting it, the pigment is nice and strong for this project.
Oil pastels
Saran wrap
Paintbrushes and water


Talk to them about wax resist.
Oil and water don't mix so it's a great art technique.
Explain that they will draw a main fish and some background life with the oil pastels. Press down hard, they can use white too, light colors will show up nicely. They can squiggle sea plants etc. Paul Klee was colorful and fanciful. Encourage them, there are no mistakes, no need for perfection. It is all different and beautiful. They will be leaving all of their paper blank that they have not drawn the sea life.

Explain how now they will apply the watercolor, and since oil and water don't mix, (or wax and water) that even if when they brush the watercolor over their drawings, it will not adhere to the pastels.
Have them cover the whole sheet completely using the blue and green watercolor (not mixing them, just applying them separately)
While they are still wet, quickly cover it in a layer of Saran wrap.
Squish it into wrinkles. Put on a shelf to dry until the next day. They are done. Don't forget their names on the back!
When the plastic wrap is taken off the next day, it will give the appearance of under water scene. Take photos and email them to sharonroe1@me.com and I will put them on Artsonia


Wednesday, September 14, 2011

Insects in art


In second grade 1st semester they are learning all about insects! Well, there's really not a lot of famous artists that specialize in bugs. But, there are some really cool art works from really talented artists starring bugs!

I put together a slide show here.....Insects in Art
You can ask the kids what kind of bugs they are? Talk about the fun ways artists differ from creating each insect painting.


Project: the children will create their own bug on a tree stump.
Using water colors and sharpies.


Materials needed:
8 x10 watercolor or thick artists paper, white
Thin brown water color marker
Water color palettes ( for shades of green) brushes,
Small cups for water
Lots of different colored sharpies, NOT REGULAR MARKERS, they won't adhere. Only the permanent sharpies will draw on the plastic.
Black sharpies for outlining insect
(all of the above should be in the art room)
I do like the art paper from hobby lobby, the thick watercolor paper comes in pads of 50 and it's pretty cheap!
You will need those clear plastic Avery type paper holders that go in the kids notebooks. I cut 4 inch circles out of them, you can get 8 (4 double thickness) circles form each page. I would have enough for 2-3 circles per child .


Paintings on wood by Mara Minuzzo


During class, after you give the slide talk,
Pass out white paper, names on back in pencil.
Explain that they will first draw a large tree stump, they will want it as wide as the paper, it looks great if it extends past the edge

1. Take the thin watercolor brown marker and draw a huge circle for the outside of the tree stump, show the example.
This Is an IMPORTANT PART! If the circles are too small, they'll have to start over, make sure to SHOW them how BIG the stump should be.
2. Ok, now they need to find the middle of their stump and start with small circles or spirals, make the rings of the tree.
3. Take out the water colors, they can use yellow/brown water color to fill in the stump, if they used enough brown pencil, this will make a nice wood color.
4. Here's what the kids ask...it's too dark, add water or yellow, too brown add yellow, too yellow add brown, someone added a tiny bit of orange and it looked great.
5. Have them clean and wipe brushes, then generously apply shades of green water color for the grass. Fill it all in.


6. Now they will use the printouts of how to draw bugs, have them choose an insect, then they will draw their insect step by step on the plastic cut out circles. Then they can fill them in with colored sharpies. If the black smears, they can color on the opposite side. Link to bug drawings


7. If there is time, they can do more bugs, when they are done, and the watercolor has dried, put some clear glue stick on the back, and place on the stump where they want their bugs.
8. If you want, you can "frame" them by mounting them on larger black construction paper.